
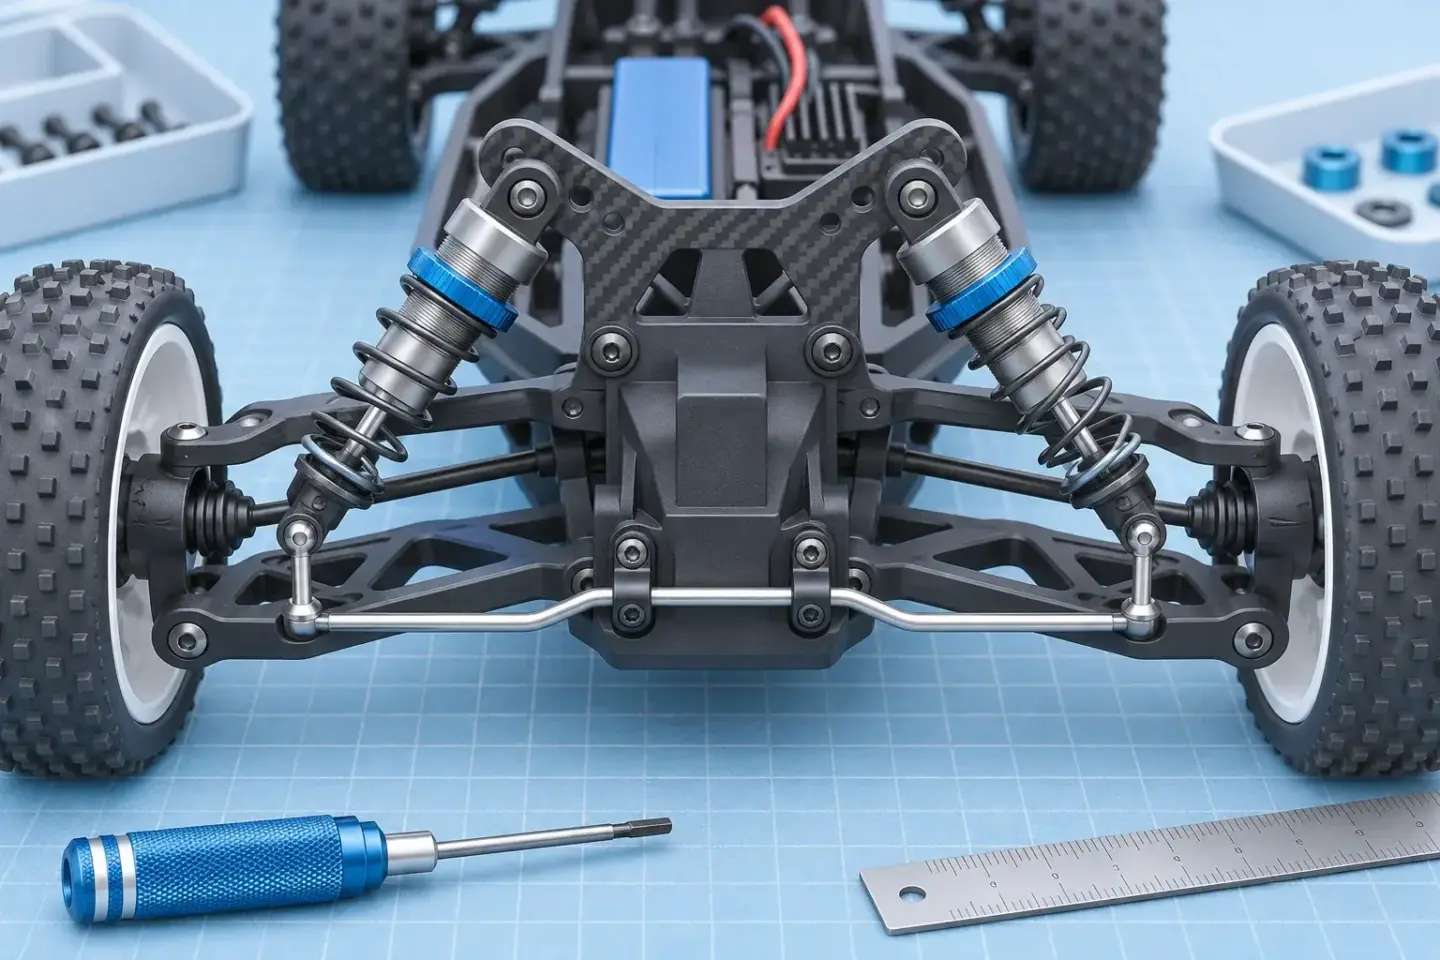
An anti-roll bar joins the left and right suspension through a spring element. It matters when the two sides move differently, as they do when the chassis rolls. It is therefore worth checking as a system: bar, supports, links, suspension and tyres. A new bar cannot tell you whether a tight hinge pin or mismatched link was causing the original problem.
This guide continues the subject of the old Blue Groove “Anti Sway Bars Kits” category. It is not a recovered installation sheet for a particular kit. Use the chassis manual for the part number, link geometry and assembly sequence.
Define the job in one sentence
Start with an observation you can repeat. “The truck tips during the fast left turn after the straight” gives you a location and operating condition. “The suspension needs upgrading” does not. Record whether you are braking, coasting or accelerating, whether the surface is smooth or broken, and whether the problem happens in both directions.
Team Associated’s RC8B3.1 guide describes anti-roll bars as a way to reduce excessive chassis roll and gives thinner and thicker options for different traction conditions. These are chassis-specific tuning directions, not a promise that the thickest bar will make every monster truck safer or faster. See the manufacturer’s front and rear anti-roll-bar sections.
Bench pass: remove the uncertainty you can see
Disconnect the battery before mechanical work. Photograph the existing installation and copy the current setup sheet. Check the bar’s identity and orientation against the manual. Do not mix a front bar and rear bar because their wire diameters appear alike: the bends, support spacing and leverage may differ.
- Inspect links, ball joints, collars and supports for damage or loose fasteners.
- Move the suspension through its intended travel and check clearance around the driveshafts, arms and chassis.
- Where the manual permits disconnecting a link for diagnosis, compare movement with and without the bar coupled. Reassemble before running.
- Compare left and right link settings using the same reference points. Write down the measured lengths rather than relying on exposed thread counts alone.
- Check tyre identity and obvious condition differences before interpreting a left-right handling difference.
Equal-looking hardware is only a starting point. Bent components or different attachment points can produce different behaviour despite matching measurements. The aim is to establish the manufacturer’s neutral assembly and identify interference. Do not preload a link simply to make the chassis appear level on an uneven table.
Why diameter alone does not describe the setup
A bar’s effect depends on more than its thickness. Its material, shape and effective lever arms matter, as does the way the suspension drives the links. A diameter number becomes useful when you compare parts from the same specified family on the same car. Comparing a touring-car wire with a monster-truck kit by diameter creates a false shortcut.
Record adjustment positions as well as the part number. If the design permits moving a link attachment, describe which hole or measured position you used. Avoid vague entries such as “middle” when several pieces each have three holes. A photograph with the relevant point marked is often the quickest way to make a setup repeatable.
Track pass: change one thing you can reverse
Choose a short, clear section where the symptom occurs and drive at a controllable pace. Establish several clean passes with the baseline. Then make one manufacturer-supported change at one end of the car. Keep the tyres, ride height, battery arrangement and driving task the same. If the surface changes substantially, label the comparison inconclusive.
Judge three things separately: the original symptom, steering response and behaviour over bumps. A setup that looks flatter may be less pleasant on your actual terrain. If one problem improves and another becomes worse, record both. “Less roll, more nervous over the rough exit” is a usable result; “bar works” is not.
Do not combine new bars, new springs and a different tyre compound in the first comparison. That may produce a good car, but it will not show which change helped. Keep a return path by saving the old parts and baseline measurements.
Stop conditions
Stop for binding, a link coming loose, contact with a rotating part or a new severe left-right difference. Return to the bench before another run. If the problem is a rollover, also inspect the driving line, surface transitions and tyre behaviour; an anti-roll bar is not a guarantee against tipping.
The useful final record is short: chassis, tyres, surface, bar identity, adjustment position, symptom and result. Put it beside the run notebook. Next time the surface changes, you will have an actual starting point.